Saturday
Valentines Fabric Envelopes
Friday
Winter Quilt Show and Finished Projects
I attended the Winter Quilt Show in West Bend last week and I bought quite a bit of cool stuff. I'm not that fond of wearing t-shirts but I absolutely had to have this one! I picked up some longarm supplies as well. A quilt show is usually the best place to get stuff discounted for my longarm. It's nice to see some of the shows get back to pre-pandemic practices.
 |
 |
Monday
Zipper Pouches and Other Stuff
I've been experimenting with making new zipper pouches. I started by embroidering a few designs on some linen fabric. Then I matched them up with some fabrics to make the pouches. It was really fun to put these together.
I'm thinking these would make nice gifts or something fun to sell at my next craft fair.
The flowers are blooming like crazy around here. Aren't these pretty?
August is my favorite month. Nature's beauty is apparent and I love the hot weather.
Last week we bartended at Irish Fest in downtown Milwaukee. And we saw Maroon 5 at the American Family Amphitheater on the lakefront.
I went with a friend to a June Tailor warehouse sale this week too. Judy Gauthier, who is featured at the event was there. She is a quilt book author (3 books actually) and a quilt shop owner. I've known her for a long time and I looked forward to seeing her again. I made sure we got a photo together while I was there.
Friday
Small Projects
Sunday
Fall Church Craft Fair - Success!
In the past, I've had some success at this fair. But I never thought it was that great. I never took the time to figure out how to do better until after I retired from my full time job. Now that I have more time to concentrate on my hobbies, I started researching how to do better.
One of the things I noticed in most articles I've read is not to have too many items. People get overwhelmed if there's too much to look at. Keeping it simple seems to be the way to go. I am working toward that goal by limiting my inventory to less things. I also sorted my inventory and display it differently so more like things are together.
 I used some bins to display all my baby items. They are all in one place now. I used my display rack to hold all my bags and pouches. Everything is viewable in one spot.
For a change, I brought along some quilts. I never expect to sell any since the price point is high. It seems most people attending our fair are looking for small, reasonably priced items.
An amazing thing happened this year....I sold more than double than I have ever sold before. My marketing strategy worked. The advice worked. How wonderful!
I also sold a quilt. What a happy unexpected surprise. For the first time in a long time, I am excited to enter the craft fair vending world. I will definitely look for more marketing tips before the next fair.

Some of the items I sold include:
- Baby Blankets
- Burp Cloths
- Boo-Boo Rice Bags
- Quilted Gift Bags
- Zipper Pouches
- Bowl Cozies (sold out)
- Hot Pads (sold out)
- Table Runners
Mini Zipper Pouches
I made a few of these a while back and my granddaughters love using them for their little Shopkins and to hold their allowance. I think they might make a nice item at craft fairs.
Monday
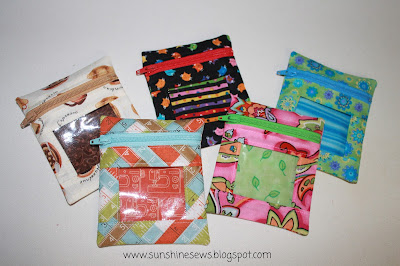
Mini Notions Bags
 I've had the tutorial for a cute mini notions bag on one of my Pinterest boards for quite a while and today I thought I would give it a whirl. As part of my new year's resolution to try new things, this would qualify.
The tutorial used 4-inch zippers and I have a bunch of them leftover from another craft project. I buy all my zippers from ZipIt - an Etsy store that I love. The zippers are reasonable and the more you buy the cheaper they get so of course I bought way more than I needed. So I decided to try this tutorial and the largest piece to cut was 5 inches by 4 and a quarter inches. That meant using up scraps.
This may seem like a funny way to use up scraps but basically what I did was take out my 4-inch zippers and match the colors of the zippers to the scraps I had. I came up with many great combinations.
To make this project even better, while I was digging through my scrap bin, I found some leftover pieces of clear vinyl from an I-Spy project I did with some of my coworkers for an Alzheimer's awareness event. We made I-Spy bags for patients in nursing homes. It was a lot of fun and rewarding.
I cut the pieces out and made a few changes to the original tutorial from Simply Notable that can be found here. First of all, the original project used laminated fabric and I used quilting cotton. That meant I had a little more fraying to deal with so I zigzagged the edges after I sewed around the edges. Secondly, I butted a piece of lining fabric up against the backing fabric so there would be a liner inside the back of the little bag. That way when you peeked in the vinyl window, you would see the lining instead of the back side of the backing. Third, I didn't use a Teflon foot. It wasn't really necessary as long as I put my cotton fabric on top of the vinyl, there was no problem with sticking while sewing.
And that's about it. Aren't they cute?
Tuesday
Kitty Zipper Pouch
 This is a little project made from a toddler t-shirt. The cute little shirt has a kitty on it and it is a little faded - a sure sign of shirt love from lots of wear.
I cut the image from the shirt while trying to keep as much surrounding fabric as possible. Thus the rectangular shape of the pouch.
 I used a pretty cotton fabric on the back that complimented the colors within the image. I also found some cute kitty fabric in a green print, the same color as the text on the t-shirt image.
I made some pockets inside the pouch to make it a little more versatile. The color combinations in this little bag were so very much fun to use.
Friday
Zippered Pencil Pouch
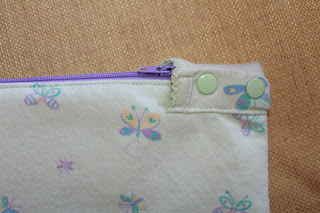
 I received a request to take an adorable onesie and turn it into a pencil pouch. The request included using the pocket on the front of the onesie and the snaps that were on the shoulder. I wasn't sure how I would accomplish the snap request so it took me some time to get started. In fact even after I started on the project, I tried to make a pocket for the back that would incorporate the snaps. After I stitched it up, I didn't like it so I took it apart. Then I tried something else. And I took it apart again. I struggled to find the right solution that would maintain the cuteness of the onesie yet keep the snaps functional.
I thought I would move on to a different part of the project - the front. Since this was a shirt, the tapered shape towards the neck was going to be an issue. I noticed that the sleeves had an adorable little scalloped trim on the edges so I used those sleeves to add fabric to the top of the pouch. I wanted the additions to be even on both sides, but that was difficult since I had to cut more fabric around the snaps on the one shoulder to use the snaps within the bag. So after I added the sleeves to the corners, I evened up the piece to center the little pocket and called the rest character.
Once I took some time off from thinking about how to make the snaps work in the project, that's when the inspiration hit! I love when that happens. I would make the snaps a part of the closure and it would look like a natural part of the zipper closure. To make things come together even better, I came across the cutest scrap fabric from my stash that would compliment the colors in the onesie perfectly. It was all coming together nicely.
I really like repurposing sentimental things into useful items and I hope it brings a smile to its owner.
Thursday
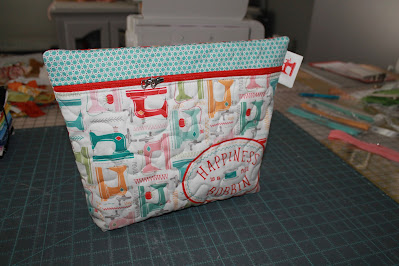
3-Zipper Pouch
I auditioned 3 different fabrics, 2 were floral and 1 was the doily-print I actually used. I left the fabrics next to the t-shirt for about a week and struggled to pick one of the florals. Then my daughter stopped by, took one look at the fabric selections and instantly stated that I HAD to use the doily-print.
The print was something I picked up from a modern quilt shop and was not planning on using it for something I would be selling. I secretly wanted it for myself. I think that was part of the hesitation in using it for this project.
But it was a perfect match with the t-shirt graphic. Once that was decided I had to figure out how to make the pouch. I had a smaller version to use as a sample. With no pattern, I cut up pieces and through trial-and-error, put the pouch together. I only had to unsew pieces twice!
I gently removed the logo tag from the inside of the t-shirt and sewed it in place as if it were a label. Then I finished off the inside seams with some bias ribbon and it was completed. I sure hope my client likes it; it is so very soft and cute.
Wednesday
Fully Lined Zipper Pouches
Once I had a bunch of the correct size zippers, I went through my scraps in an effort to purge some of the cute fabric scraps. I ended up cutting fabric for 11 pouches. Unfortunately, I ran out of the lobster clasps when I got to the ninth pouch so I will have to order more if I want to finish the rest of what I've already cut out.
I did learn that not all fabrics are great choices for these little pouches. The fabric that shows above the zipper is exactly 1 inch, so if the print is too big you can't really tell what the image is. And if the fabric has text on it, because the back panel is folded to the front your fabric is going to be upside-down on either the front or back depending on how you sew the fabric to the zipper.
For the most part, they are pretty cute. I used the tutorial found here to make the pouches. The only change I made is that I added 1/8 of an inch to the sides of the pieces which allowed ease when sewing the side seams around the zipper.


